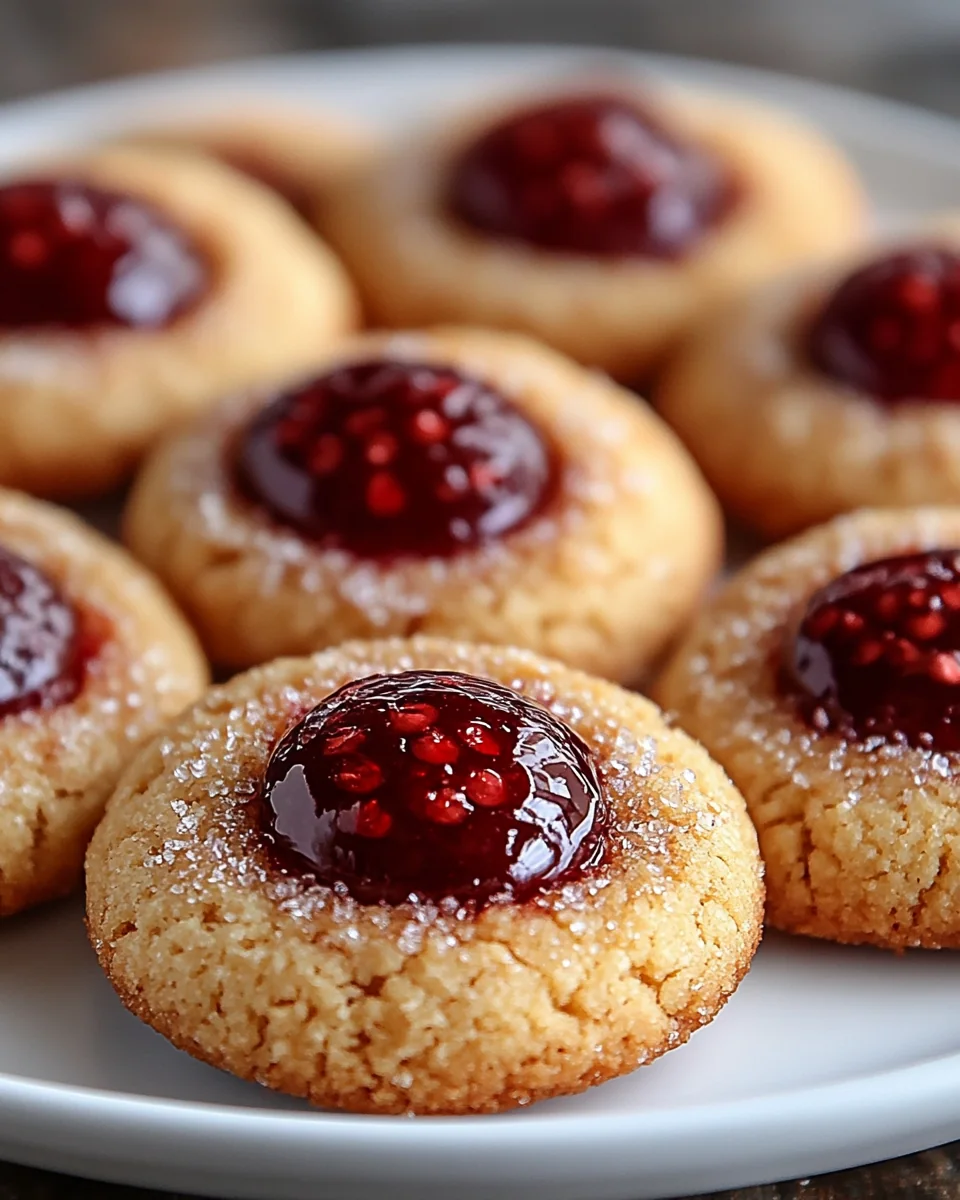
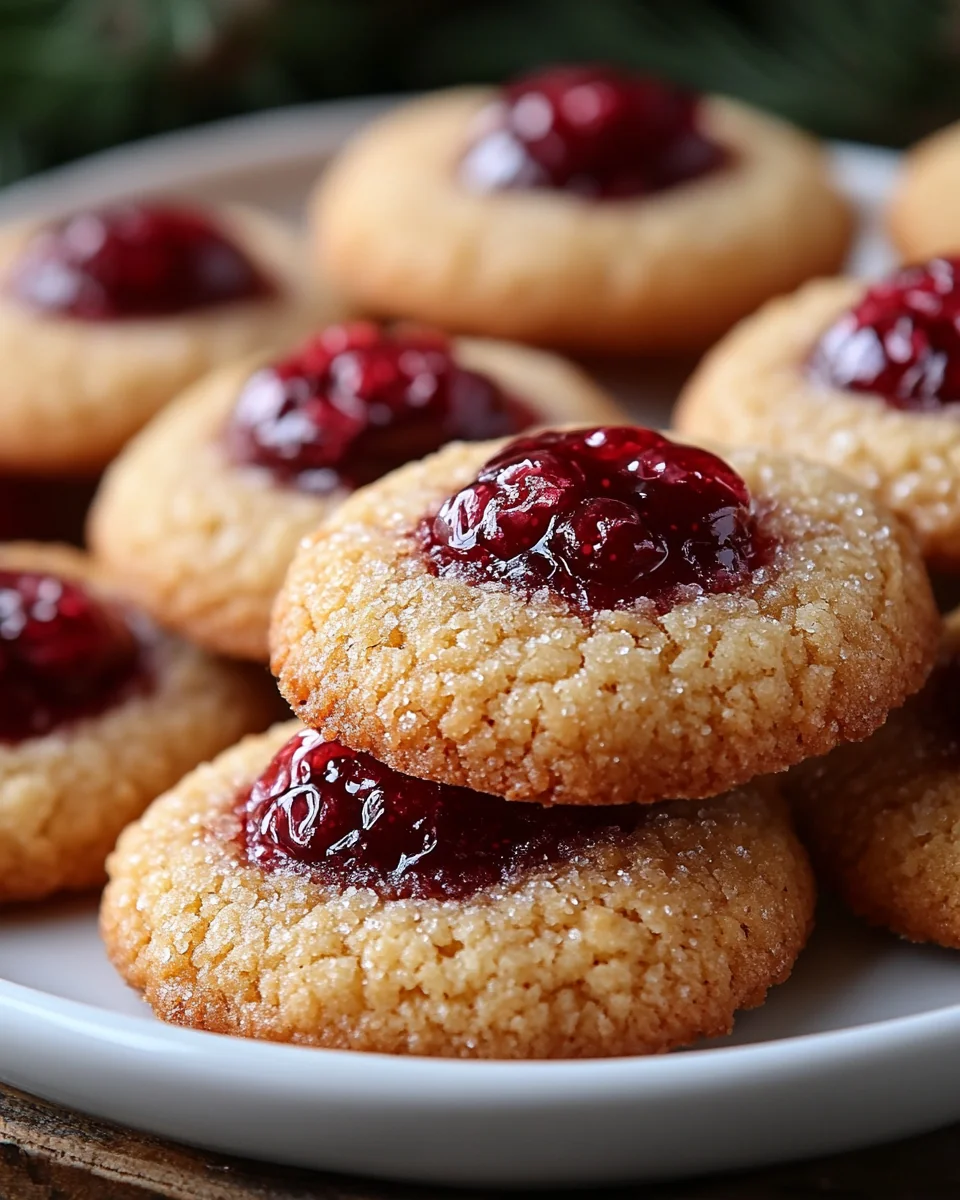
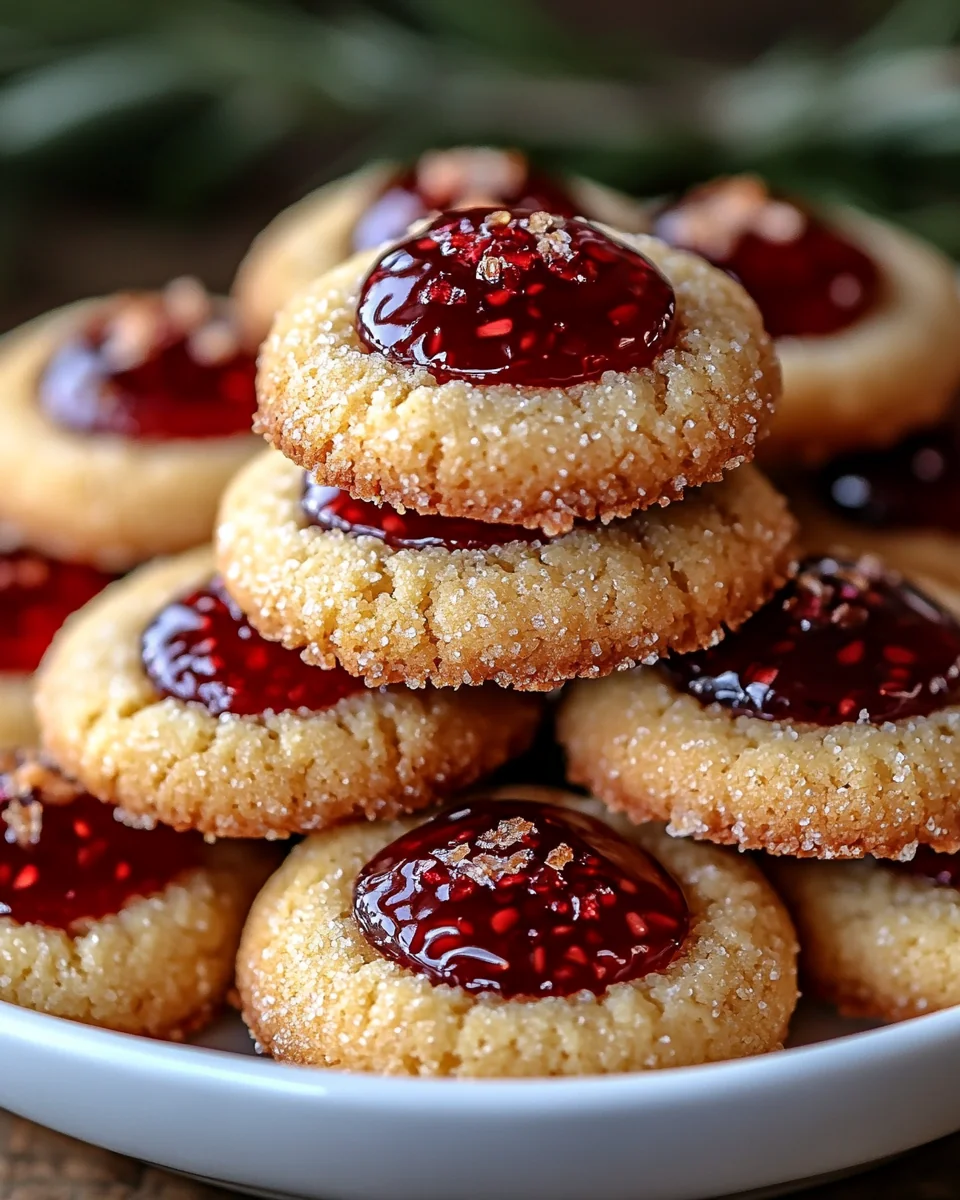
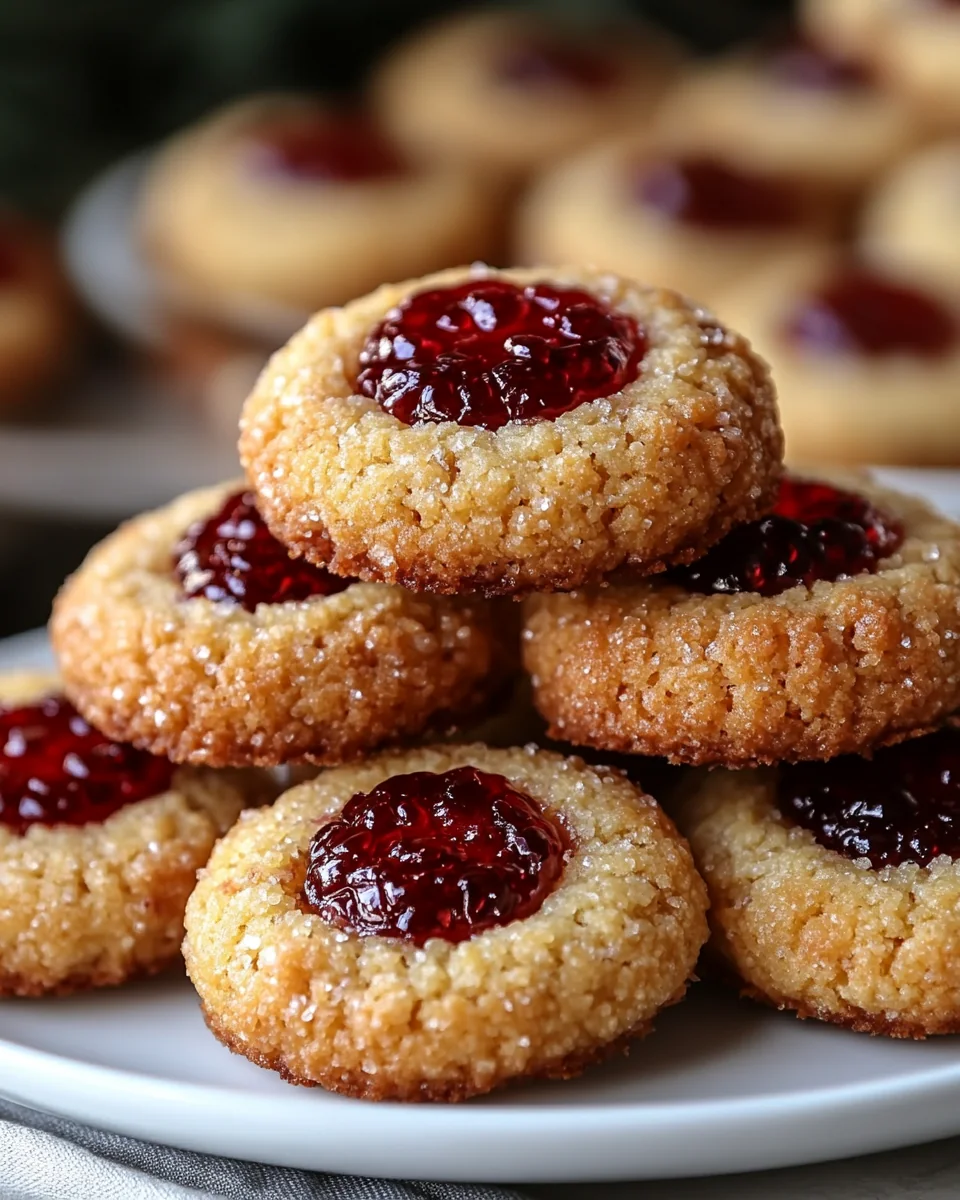
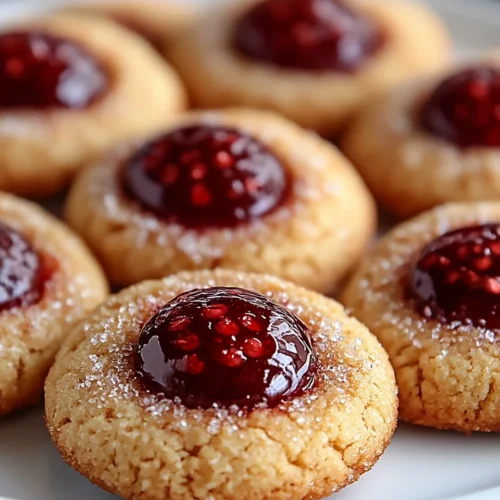
Quick Homemade Jelly Thumbprint Cookies
Quick Homemade Jelly Thumbprint Cookies are a charming treat that seamlessly combines a buttery cookie base with sweet, fruity jelly. Perfect for any occasion, these cookies are not just a delicious snack but also a delightful addition to family gatherings or holiday celebrations. The contrasting textures of the soft cookie and the gooey jelly filling create a satisfying bite that is sure to please both children and adults alike. These cookies are incredibly versatile, allowing you to choose your favorite jelly flavor, making them suitable for a variety of taste preferences. Their simplicity and ease of preparation make Quick Homemade Jelly Thumbprint Cookies a go-to recipe for both novice bakers and seasoned chefs looking for a quick and delicious dessert option.
Why You’ll Love This Recipe?
This recipe for Quick Homemade Jelly Thumbprint Cookies stands out for several compelling reasons. Firstly, the taste is simply irresistible. The buttery cookie base pairs perfectly with the sweet and tangy jelly, creating a flavor profile that is both comforting and satisfying. Each bite is a delightful experience that will leave you craving more. Secondly, the ease of preparation makes these cookies a favorite among busy families. With minimal ingredients and straightforward steps, you can whip up a batch in no time. This makes them an excellent choice for weeknight baking or unexpected guests.
Moreover, the texture of these cookies is a true highlight. The soft and slightly crumbly cookie contrasts beautifully with the smooth jelly center, making each bite a textural delight. Lastly, the versatility of this recipe allows for creativity. You can experiment with different types of jellies or even use homemade fruit preserves to elevate the flavor. Whether you prefer raspberry, apricot, or strawberry, the choice is yours, making Quick Homemade Jelly Thumbprint Cookies a customizable treat that can cater to any palate.
Ingredients to make The recipe :
To create the perfect batch of Quick Homemade Jelly Thumbprint Cookies, you will need the following ingredients:
- All-Purpose Flour: This essential ingredient provides the structure and base for your cookies. You’ll need about 2 cups of all-purpose flour, which will create the perfect balance of softness and stability in the cookie dough. Flour acts as a binding agent, holding the other ingredients together while allowing the cookies to rise slightly during baking.
- Granulated Sugar: Approximately 3/4 cup of granulated sugar is needed to sweeten your cookies. Sugar not only adds sweetness but also contributes to the cookies’ texture, making them tender and flavorful. It helps to create a delightful contrast between the sweet cookie and the tangy jelly.
- Unsalted Butter: You will require 1/2 cup (or one stick) of unsalted butter, softened to room temperature. Butter is crucial for adding richness and flavor to your cookies. It also helps achieve a tender texture, melting in your mouth with each bite. Ensure the butter is soft enough to cream well with the sugar.
- Egg Yolk: One large egg yolk is necessary to enrich the dough and provide moisture. The yolk contributes to the cookies’ flavor and also helps bind the ingredients together, resulting in a more cohesive dough.
- Baking Powder: A teaspoon of baking powder will provide the leavening needed for the cookies to rise slightly during baking. This ingredient is key to achieving that light and airy texture in the finished cookies.
- Salt: Just a pinch of salt is required to enhance the overall flavors of the cookies. Salt balances the sweetness and brings out the richness of the butter, creating a well-rounded taste that elevates the cookies.
- Jelly or Jam: You will need about 1/2 cup of your favorite jelly or jam to fill the thumbprint indentations. The choice of jelly is entirely up to you, whether you prefer classic strawberry, tart raspberry, or any other fruit flavor. This ingredient adds a burst of sweetness and is the star of the cookie, providing a delightful contrast to the buttery base.
How to Make Quick Homemade Jelly Thumbprint Cookies?
To create your own batch of Quick Homemade Jelly Thumbprint Cookies, follow these detailed steps:
- Preheat Your Oven: Start by preheating your oven to 350°F (175°C). This is an essential step as it ensures that your cookies bake evenly and achieve that perfect golden color.
- Prepare Baking Sheets: While waiting for the oven to preheat, line your baking sheets with parchment paper. This will prevent the cookies from sticking and make for easy cleanup.
- Cream Butter and Sugar: In a large mixing bowl, combine the softened unsalted butter and granulated sugar. Use a hand mixer or stand mixer to cream them together until the mixture is light and fluffy. This usually takes about 2-3 minutes. Proper creaming incorporates air into the mixture, leading to a lighter texture in your cookies.
- Add Egg Yolk: Once the butter and sugar are well-combined, add the egg yolk. Mix until fully incorporated. The egg yolk adds richness and helps bind the ingredients together.
- Combine Dry Ingredients: In a separate bowl, whisk together the all-purpose flour, baking powder, and salt. This ensures that your leavening agent is evenly distributed throughout the flour before combining with the wet ingredients.
- Mix Dry and Wet Ingredients: Gradually add the dry ingredient mixture to the butter mixture, stirring gently with a spatula or wooden spoon until just combined. Be careful not to over-mix, as this can lead to tough cookies.
- Shape the Dough: Using your hands, form small balls of dough, about 1 inch in diameter. Place them on the prepared baking sheets, leaving enough space between each cookie for spreading.
- Create Thumbprint Indentations: With your thumb or the back of a spoon, gently press down in the center of each dough ball to create an indentation. Be sure not to press too hard; you want enough space for the jelly without breaking through the bottom of the cookie.
- Fill with Jelly: Spoon about 1/2 teaspoon of your chosen jelly into each thumbprint indentation. Be careful not to overfill, as the jelly may bubble over during baking.
- Bake Your Cookies: Place the baking sheets in the preheated oven and bake for 12-15 minutes or until the edges of the cookies are lightly golden. Keep an eye on them to prevent overbaking.
- Cool Cookies: Once baked, remove the cookies from the oven and allow them to cool on the baking sheets for a few minutes. Then, transfer them to a wire rack to cool completely. This step is essential for maintaining the cookies’ texture and preventing them from becoming soggy.
- Enjoy: Once cooled, your Quick Homemade Jelly Thumbprint Cookies are ready to serve! Enjoy these delightful treats with a cup of tea or coffee, or share them with friends and family.
Tips for Variations:
There are numerous ways to customize your Quick Homemade Jelly Thumbprint Cookies. Here are some creative variation ideas to consider:
- Different Jelly Flavors: Experiment with various fruit jellies or jams to change the flavor profile of your cookies. Try using unique options like blueberry, peach, or even lemon curd for a tangy twist. Each flavor will give the cookies a distinct taste and make them more exciting.
- Nut Additions: Incorporate finely chopped nuts into the cookie dough for added texture and flavor. Almonds, walnuts, or pecans can complement the sweetness of the jelly beautifully. Simply mix in about 1/4 cup of your chosen nuts during the dough preparation step.
- Chocolate Chips: For a chocolatey twist, add 1/2 cup of semi-sweet or dark chocolate chips to the dough. The rich chocolate flavor pairs wonderfully with fruity jellies, creating a delicious contrast.
- Glazing Options: Once cooled, consider drizzling a simple glaze made from powdered sugar and milk over the cookies. This adds an extra layer of sweetness and gives the cookies a beautiful finish. Mix about 1 cup of powdered sugar with 1-2 tablespoons of milk until smooth, then drizzle over the cookies.
- Decorative Toppings: Before baking, sprinkle the cookie dough balls with coarse sugar or colored sprinkles for a festive touch. This is especially fun for holiday baking and adds a delightful crunch to the exterior of the cookies.
- Cookie Sandwiches: For a fun variation, use two cookies with jelly in between to make a sandwich. This is perfect for those who enjoy a bit more filling and can be visually appealing when served.
- Seasonal Flavors: Adjust the jellies used based on the season. For example, you might choose pumpkin spice jelly in the fall or cranberry jelly during winter holidays. This keeps the recipe fresh and relevant throughout the year.
Serving Suggestions:
When it comes to serving your Quick Homemade Jelly Thumbprint Cookies, there are many delightful options to consider:
- Tea or Coffee Pairing: These cookies make a perfect accompaniment to a warm cup of tea or coffee. Their sweetness balances well with the bitterness of the drink, making them a great choice for an afternoon snack.
- Holiday Gatherings: Serve these cookies at holiday parties or family gatherings. Their vibrant colors and delicious flavors will surely draw attention and please your guests.
- Picnic Treats: Pack these cookies in your picnic basket for a delightful outdoor treat. Their sturdy texture makes them easy to transport, and their flavors will be a hit with friends and family.
- Lunchbox Snack: These cookies are an excellent addition to lunchboxes for kids or adults. They provide a sweet treat that’s easy to grab and enjoy on the go.
- Storage Tips: Store leftover cookies in an airtight container at room temperature for up to a week. For longer storage, consider freezing them. Just ensure they are fully cooled and place them in a freezer-safe bag or container to maintain freshness.
- Seasonal Celebrations: Customize the jelly flavors and decorations according to the season. For instance, use red and green jelly for Christmas or pastel colors for springtime gatherings.
- Gift Giving: Package these cookies in decorative tins or boxes for a thoughtful homemade gift. This is a lovely gesture for friends, family, or neighbors, especially during festive seasons.
FAQ:
How do I store leftovers?
Store any leftover Quick Homemade Jelly Thumbprint Cookies in an airtight container at room temperature. They will stay fresh for up to one week. If you want to keep them longer, consider freezing them.
Can I freeze this recipe?
Yes, you can freeze Quick Homemade Jelly Thumbprint Cookies. Ensure they are fully cooled, then place them in a freezer-safe container or bag. They can be frozen for up to three months. Thaw at room temperature before serving.
What types of jelly work best for these cookies?
Any fruit jelly or jam works well for Quick Homemade Jelly Thumbprint Cookies. Popular choices include strawberry, raspberry, apricot, or blueberry. Choose your favorite flavor to customize the cookies to your liking.
Can I make this recipe gluten-free?
Yes, you can make Quick Homemade Jelly Thumbprint Cookies gluten-free by using a gluten-free all-purpose flour blend. Ensure the blend contains a binding agent like xanthan gum to achieve the right texture.
How can I make these cookies more colorful?
To make your Quick Homemade Jelly Thumbprint Cookies more colorful, use jellies with vibrant hues or add colored sprinkles on top before baking. This adds visual appeal and makes them festive for any occasion.
Quick Homemade Jelly Thumbprint Cookies
Equipment
- Mixing Bowl
- Baking Sheets
- Parchment Paper
Ingredients
Dry Ingredients
- 2 cups All-Purpose Flour Provides structure and base for cookies.
- 1 teaspoon Baking Powder Provides leavening for cookies.
- 1 pinch Salt Enhances overall flavors.
Wet Ingredients
- 3/4 cup Granulated Sugar Sweetens cookies and contributes to texture.
- 1/2 cup Unsalted Butter Softened to room temperature for creaming.
- 1 large Egg Yolk Adds richness and moisture.
Filling
- 1/2 cup Jelly or Jam Choose your favorite flavor for filling.
Instructions
- Preheat your oven to 350°F (175°C).
- Line your baking sheets with parchment paper.
- Cream together the softened butter and granulated sugar until light and fluffy.
- Add the egg yolk and mix until fully incorporated.
- In a separate bowl, whisk together the flour, baking powder, and salt.
- Gradually add the dry ingredients to the wet mixture, stirring until just combined.
- Form small balls of dough, about 1 inch in diameter, and place them on the prepared baking sheets.
- Create thumbprint indentations in the center of each dough ball.
- Spoon about 1/2 teaspoon of jelly into each indentation.
- Bake for 12-15 minutes or until the edges are lightly golden.
- Allow to cool on the baking sheets for a few minutes before transferring to a wire rack.
- Enjoy your cookies once cooled!