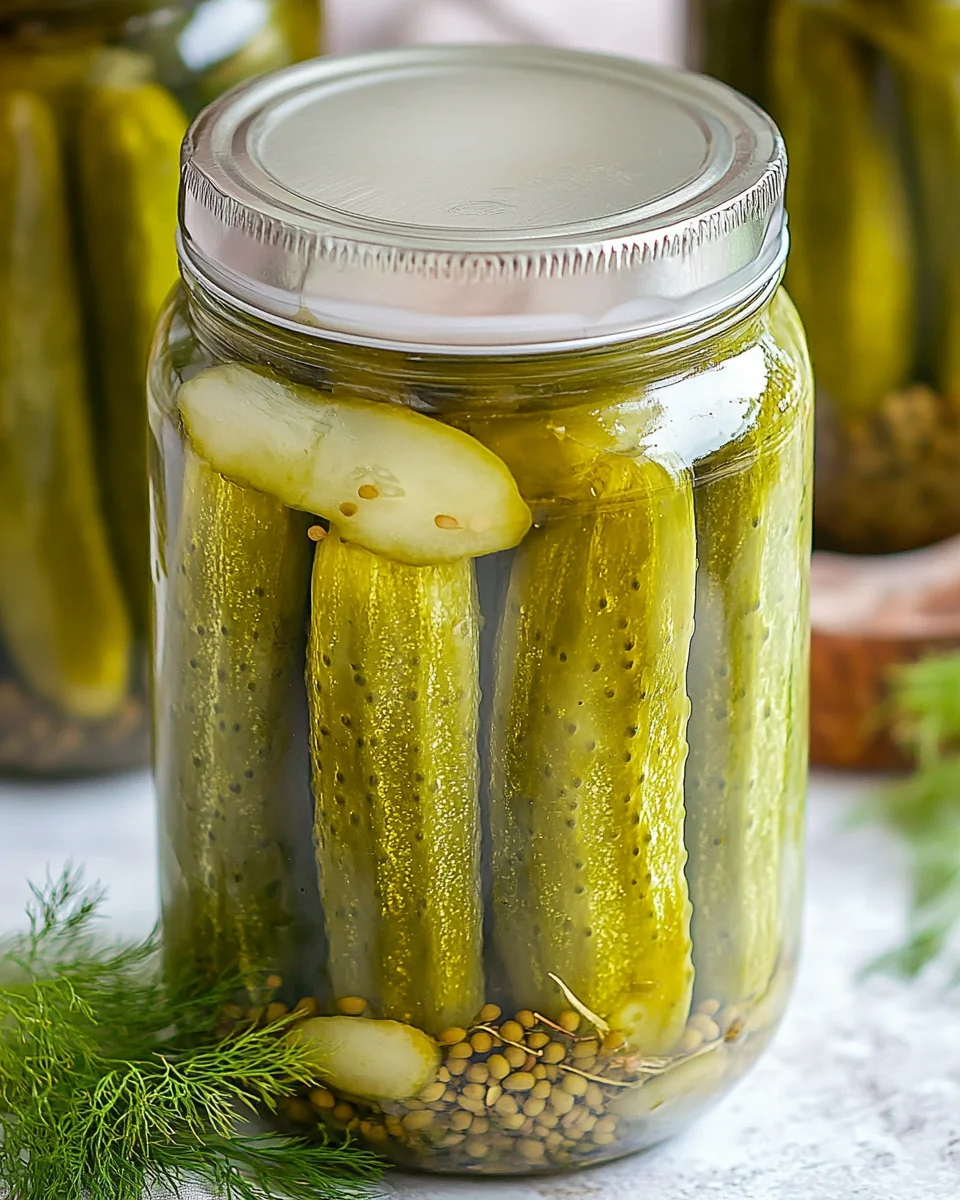
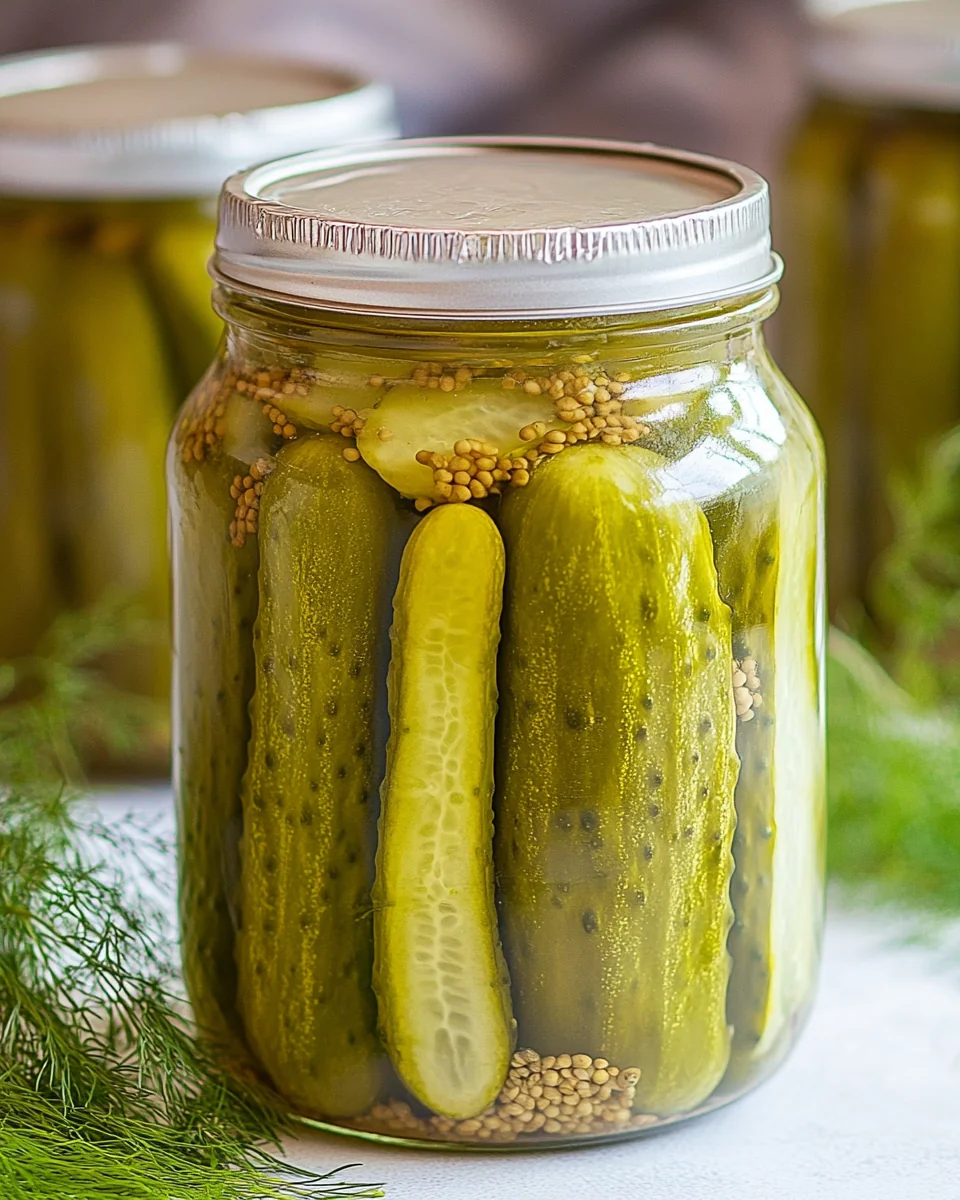
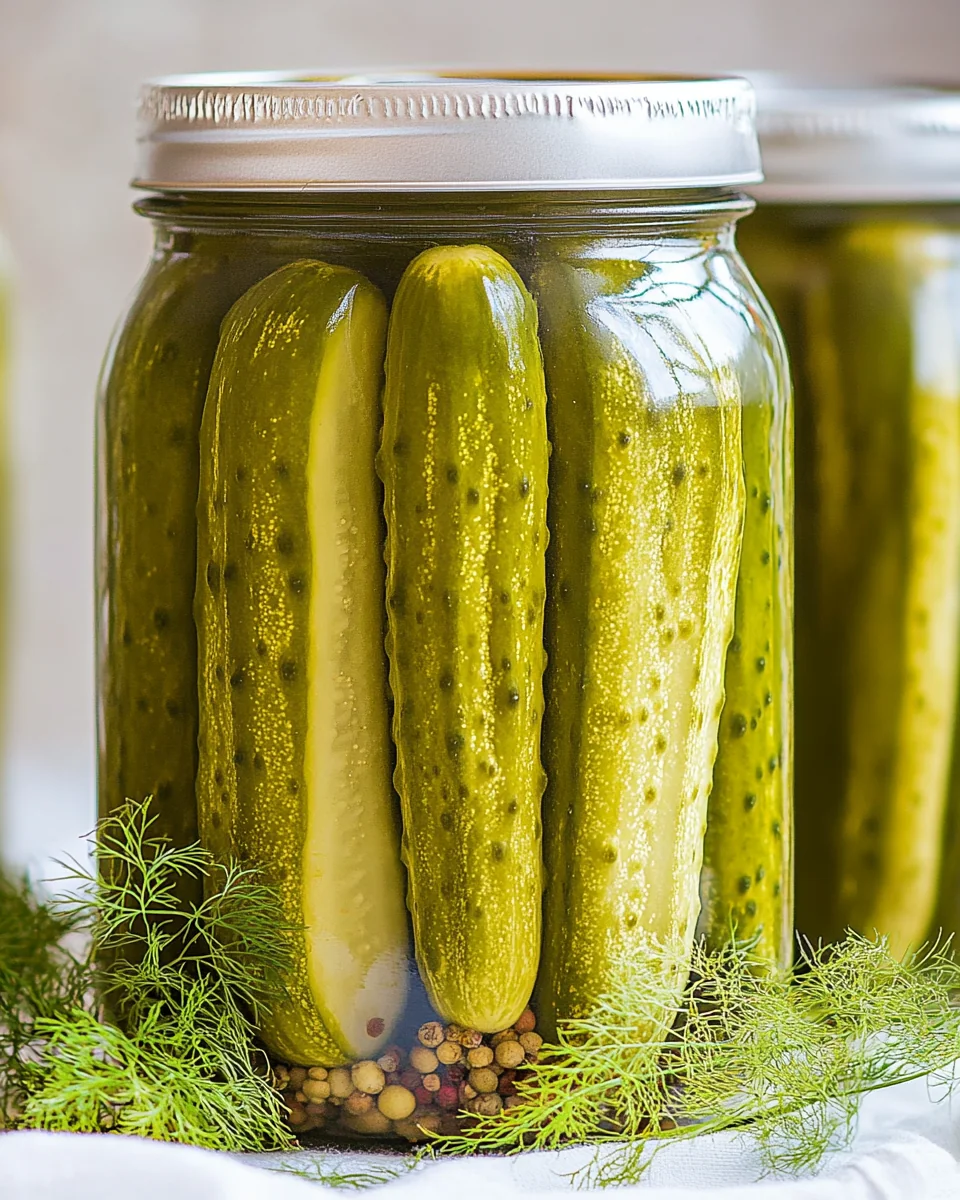
Simple Homemade Dill Pickles
Simple Homemade Dill Pickles are a refreshing and tangy addition to any meal, perfect for those who appreciate the crunch of pickled cucumbers. This recipe captures the essence of summer with its vibrant flavor, making it ideal for weeknight dinners, family gatherings, or even as a snack straight from the jar. The combination of fresh dill, garlic, and spices gives these pickles a unique taste profile that can elevate sandwiches, burgers, and salads alike. With their bright green color and zesty flavor, Simple Homemade Dill Pickles truly stand out as a beloved condiment that appeals to a wide audience, from children to adults. Not only are they easy to make, but they also provide an opportunity to preserve the harvest from your garden or local farmer’s market.
Why You’ll Love This Recipe?
This recipe for Simple Homemade Dill Pickles stands out for several compelling reasons. First and foremost, the flavor profile is unmatched. By using fresh ingredients and a perfect balance of vinegar and spices, these pickles achieve a harmony of tanginess and aromatic dill that is simply irresistible. Each bite offers a satisfying crunch, making them a delightful companion to any dish.
Another reason to love this recipe is the ease of preparation. With minimal steps involved, even novice cooks can create their own batch of Simple Homemade Dill Pickles without feeling overwhelmed. The straightforward method allows you to enjoy the satisfaction of homemade pickles without the fuss, making it an approachable project for home cooks of all skill levels.
Additionally, the versatility of these pickles cannot be overstated. They can be enjoyed in various ways, whether as a side, topping, or ingredient in salads and sandwiches. The crisp texture and zesty taste complement a wide range of foods, making them a staple in any kitchen. Overall, the combination of delicious flavor, ease of preparation, and versatility makes this recipe for Simple Homemade Dill Pickles a must-try.
Ingredients to make The recipe :
To create your own batch of Simple Homemade Dill Pickles, you will need the following ingredients:
- Cucumbers: Use 4-6 medium-sized cucumbers, preferably pickling cucumbers, which are shorter and have thicker skin. These cucumbers hold their crunch well and absorb the brine beautifully, resulting in the perfect pickle. Make sure they are firm and fresh, as quality cucumbers significantly impact the final product.
- Fresh Dill: You will need about 4-6 sprigs of fresh dill. Dill brings an aromatic and slightly sweet flavor that is essential for achieving the classic dill pickle taste. Fresh dill is preferred over dried as it provides a vibrant flavor and enhances the overall appeal of the pickles.
- Garlic: Incorporate 2-3 cloves of garlic, peeled and smashed. Garlic adds a robust flavor that complements the dill and vinegar brine, infusing the pickles with a savory depth. Adjust the quantity based on your preference for garlic intensity.
- White Vinegar: Use 1 cup of white vinegar for the brine. The acidity of white vinegar is crucial for preserving the cucumbers and delivers that classic tangy flavor characteristic of pickles. It balances well with the spices and garlic.
- Water: You will need 1 cup of water to dilute the vinegar. This helps to create a balanced brine that is neither too acidic nor too bland. Using filtered water can enhance the purity of the pickling liquid.
- Salt: Use 2 tablespoons of kosher salt, which is essential for flavor and preservation. It helps to draw out moisture from the cucumbers, ensuring they remain crunchy and flavorful. Avoid table salt, as it may contain additives that could cloud the brine.
- Black Peppercorns: Use 1 tablespoon of whole black peppercorns. These add a subtle heat and complexity to the flavor profile of your pickles. Their whole form allows for gradual flavor infusion during the pickling process.
- Mustard Seeds: Include 1 teaspoon of mustard seeds for an additional depth of flavor. They offer a slight tang and enhance the overall pickle experience. Their unique taste makes them a perfect addition to the brine.
- Red Pepper Flakes (Optional): For those who enjoy a little heat, add 1 teaspoon of red pepper flakes. This optional ingredient brings a spicy kick that balances well with the tangy and savory elements of the pickles.
How to Make Simple Homemade Dill Pickles ?
Follow these detailed steps to create your own Simple Homemade Dill Pickles:
- Begin by preparing your cucumbers. Rinse them thoroughly under cold water to remove any dirt. Trim the ends off each cucumber, as this helps them absorb the brine better.
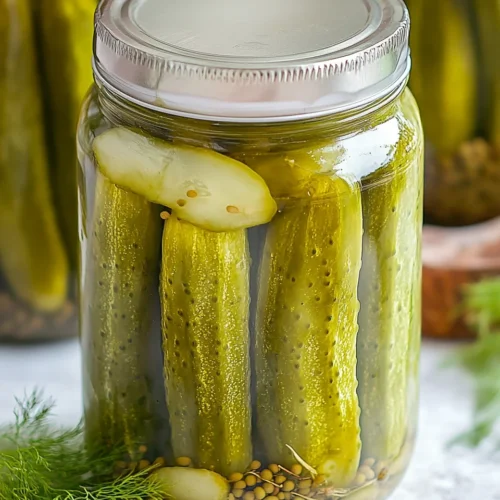
- Next, choose your jar. A 1-quart mason jar is ideal for this recipe. Ensure the jar is clean and sterilized to prevent any contamination during the pickling process.
- Place the fresh dill sprigs at the bottom of the jar, creating a flavorful base for your pickles.
- Then, layer the cucumbers vertically in the jar. Pack them tightly but not so much that they get squished. You want to maintain their shape and crunch.
- In a small saucepan, combine the white vinegar, water, and kosher salt. Heat the mixture over medium heat, stirring occasionally until the salt completely dissolves. This creates your brine.
- Once the salt has dissolved, add the smashed garlic cloves, black peppercorns, mustard seeds, and red pepper flakes (if using). Allow the brine to come to a gentle boil, which helps to release the flavors from the spices.
- After boiling for about 2-3 minutes, remove the saucepan from heat. Carefully pour the hot brine over the packed cucumbers in the jar. Ensure that the cucumbers are fully submerged in the brine. You may need to press them down gently.
- Allow the jar to cool to room temperature. This step is essential, as it prevents the glass from cracking and helps the cucumbers absorb the flavors from the brine.
- Once cooled, seal the jar with a lid and place it in the refrigerator. This step is crucial for the pickling process, as refrigeration helps develop the flavors.
- Let the pickles sit in the refrigerator for at least 24 hours before consuming. However, for best results, allow them to pickle for 1-2 weeks. The longer they sit, the more flavor they will develop.
- Once your Simple Homemade Dill Pickles are ready, enjoy them as a crunchy snack, a tangy addition to meals, or even as a garnish for cocktails (non-alcoholic). These pickles will last in the fridge for several months; just ensure they remain submerged in the brine for optimal freshness.
Tips for Variations:
Explore these creative variations of Simple Homemade Dill Pickles to personalize your pickling experience:
- Spicy Dill Pickles: For those who crave heat, consider adding sliced jalapeños or additional red pepper flakes to the brine. The spiciness will infuse the pickles, creating a zesty, fiery flavor that pairs beautifully with sandwiches and burgers.
- Garlic Dill Pickles: If you are a garlic lover, increase the amount of garlic cloves used in the brine. You can also experiment by adding whole peeled cloves for a milder garlic flavor, which will intensify over time as the pickles marinate.
- Sweet and Sour Dill Pickles: Incorporate a tablespoon of sugar into the brine to create a sweet and tangy flavor profile. This balances out the acidity of the vinegar and creates a unique taste that is perfect for those who enjoy a hint of sweetness in their pickles.
- Herb-Infused Dill Pickles: Enhance the flavor by adding other fresh herbs such as thyme, oregano, or coriander to the jar. These herbs will impart their unique characteristics, creating a more complex flavor profile.
- Mixed Vegetable Pickles: Expand your pickling adventure by adding other vegetables such as carrots, radishes, or cauliflower to the mix. These vegetables will absorb the brine and add variety to your pickle jar, creating a colorful and flavorful medley.
- Curried Dill Pickles: Experiment with curry powder or turmeric for a unique twist. These spices add an aromatic quality to the pickles, offering a distinctive flavor that is especially delicious when served alongside Indian dishes.
Serving Suggestions:

When it comes to serving your Simple Homemade Dill Pickles, the possibilities are endless:
- As a Side Dish: Serve your pickles alongside grilled meats, sandwiches, or charcuterie boards. Their tangy flavor complements rich dishes perfectly, making them a refreshing palate cleanser.
- In Salads: Chop your pickles and incorporate them into salads. They add a crunchy texture and a burst of flavor that elevates greens and grain salads alike.
- Sandwich Topping: Use your pickles as a topping for burgers and sandwiches. Their crispness and flavor enhance every bite, creating a satisfying combination of textures.
- During Ramadan: Incorporate your pickles into iftar meals as a side dish. Their acidity can aid in digestion after long fasting hours, making them a perfect addition to your spread.
- Storage Tips: Store your pickles in the refrigerator for up to three months. Ensure they remain submerged in the brine to maintain their crispness and flavor. Label the jar with the date you made them to keep track of their freshness.
- Seasonal Pairings: Pair your pickles with summer barbecues, picnics, or holiday gatherings. Their bright flavor adds a lovely contrast to hearty dishes and is sure to be a hit with guests.
FAQ:
How do I store leftovers?
To store leftovers of your Simple Homemade Dill Pickles, ensure the jar is tightly sealed and kept in the refrigerator. They will maintain their flavor and crunch for up to three months if submerged in the brine.
Can I freeze this recipe?
Freezing is not recommended for Simple Homemade Dill Pickles as it affects their texture and crunch. Instead, enjoy them fresh from the refrigerator for the best taste and quality.
How long do the pickles need to sit before they are ready to eat?
Your Simple Homemade Dill Pickles should be refrigerated for at least 24 hours, but ideally, allow them to sit for 1-2 weeks for the best flavor development.
Can I use different types of cucumbers for this recipe?
While pickling cucumbers are preferred for their crunch, you can use slicing cucumbers if necessary. However, they may not hold their texture as well as pickling cucumbers.
What should I do if my pickles are too salty?
If your Simple Homemade Dill Pickles turn out too salty, try rinsing them under cold water before serving. This can help reduce the saltiness without compromising flavor too much.
Simple Homemade Dill Pickles
Equipment
- Mason Jar
- Saucepan
Ingredients
Cucumbers
- 4-6 medium Pickling Cucumbers Firm and fresh for best results.
Fresh Dill
- 4-6 sprigs Fresh Dill Essential for classic dill pickle flavor.
Garlic
- 2-3 cloves Garlic Peeled and smashed for flavor.
Brine
- 1 cup White Vinegar For tangy flavor and preservation.
- 1 cup Water To dilute the vinegar.
- 2 tablespoons Kosher Salt Essential for flavor and preservation.
Spices
- 1 tablespoon Black Peppercorns Adds subtle heat and complexity.
- 1 teaspoon Mustard Seeds For additional depth of flavor.
- 1 teaspoon Red Pepper Flakes Optional for added heat.
Instructions
- Rinse cucumbers under cold water and trim the ends.
- Choose a clean, sterilized 1-quart mason jar.
- Place fresh dill sprigs at the bottom of the jar.
- Layer cucumbers vertically in the jar, packing them tightly.
- In a saucepan, combine vinegar, water, and salt. Heat until salt dissolves.
- Add smashed garlic, black peppercorns, mustard seeds, and red pepper flakes to the brine.
- Bring the brine to a gentle boil for 2-3 minutes.
- Pour the hot brine over the cucumbers, ensuring they are submerged.
- Allow the jar to cool to room temperature before sealing.
- Refrigerate for at least 24 hours, ideally 1-2 weeks for best flavor.
- Enjoy your pickles as a snack, side, or topping!